Halloween Witch Hat Cookies
If you’re looking for a fun and festive treat to celebrate Halloween, these Halloween Witch Hat Cookies are just what you need! With their playful design and chocolaty goodness, they’re perfect for impressing guests at your spooky gatherings or creating delightful memories with your little ghouls and goblins in the kitchen. This recipe is not only easy to follow but also an enjoyable project that brings out the creativity in everyone.
What I love most about these cookies is how customizable they are. You can let your imagination run wild with colors and decorations, making each witch hat unique. Whether it’s a family gathering or a Halloween party, these cookies will surely be the star of the show!
Why You’ll Love This Recipe
- Easy to Make: The steps are simple enough for kids to help. Baking together creates lasting memories.
- Customizable Designs: Get creative with colors and toppings; no two witch hats have to look the same!
- Perfect for Any Occasion: These cookies are great for Halloween parties, school events, or just a cozy night in.
- Deliciously Fun: With chocolate cookies and sweet icing, every bite is a delightful treat that everyone will enjoy.
- Make Ahead Convenience: Bake the cones and prepare the icing in advance so you can assemble them just before serving.
Ingredients You’ll Need
Gathering ingredients for these Halloween Witch Hat Cookies is a breeze! You’ll find that they are simple, wholesome, and fun to work with. Here’s what you’ll need:
For the Witch Hats
- Favorite Cake Mix or Try Wilton’s Chocolate Cake Recipe
- Store Bought Chocolate Cookies or Try This Recipe from Wilton
- Lemon Yellow Icing Color
- Black Color Mist Food Coloring Spray
- Rose Icing Colors Pink Food Coloring
- Violet Icing Color, Gel Food Coloring
- Golden Yellow Icing Color
- Orange Icing Color
- Sugar Cones
- Creamy White Decorator Icing, 4 lb. Tub
Variations
This recipe is flexible, allowing you to get creative! Here are some fun variation ideas:
- Try Different Cookie Bases: Use vanilla or peanut butter cookies instead of chocolate for a unique twist.
- Colorful Icing Options: Experiment with different color combinations for the icing—think bright greens or spooky blacks.
- Add Fun Sprinkles: Decorate with Halloween-themed sprinkles or edible glitter for an extra festive touch.
- Mini Versions: Create smaller versions of these witch hats using mini cones for a cute snack option!
How to Make Halloween Witch Hat Cookies
Step 1: Prepare & Bake the Cones
Start by preparing your cake mix according to the instructions on your chosen recipe. This step is crucial as it forms the base of your witch hats. Then, place your Cupcake Cones Baking Rack on a cookie sheet and insert sugar cones into it. Fill each cone with about 2 tablespoons of cake batter before baking them according to your recipe’s timing instructions. Once baked, let them cool completely before moving on.
Step 2: Spray the Cones
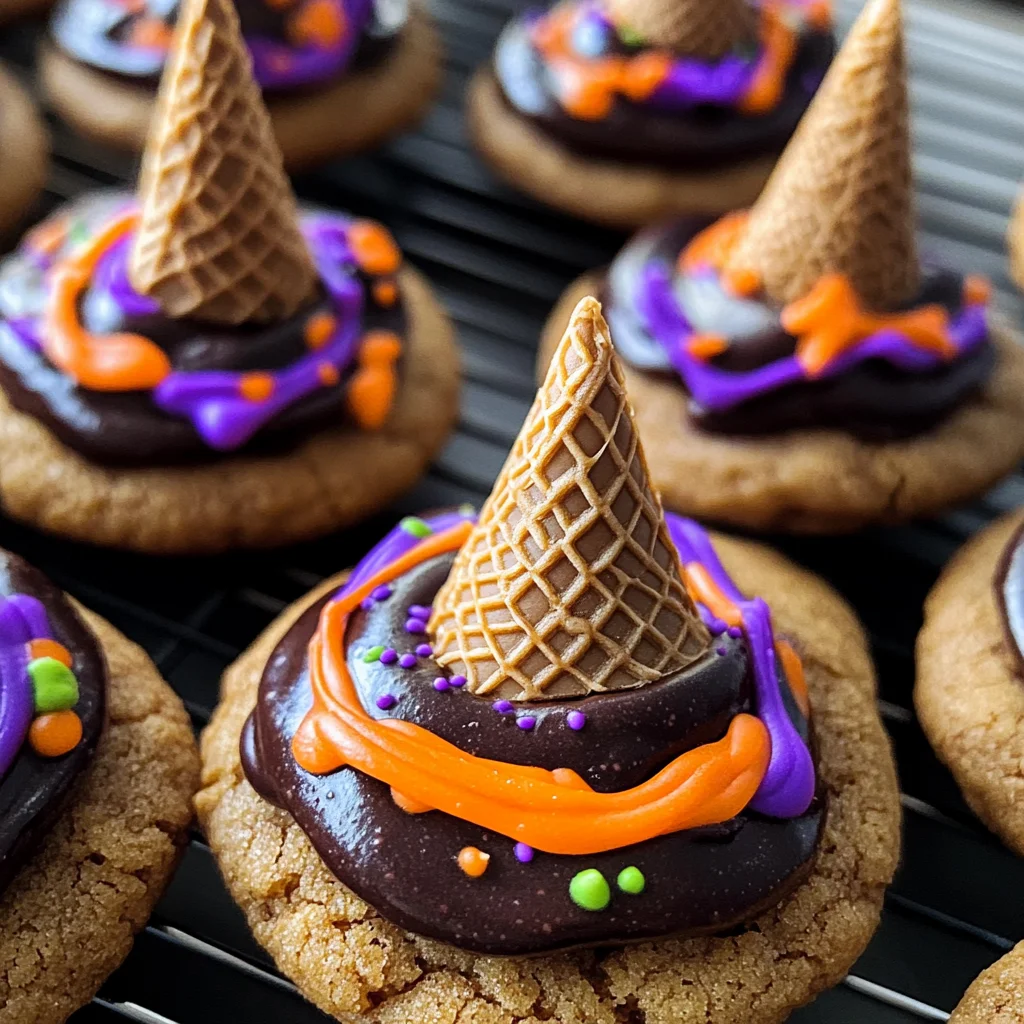
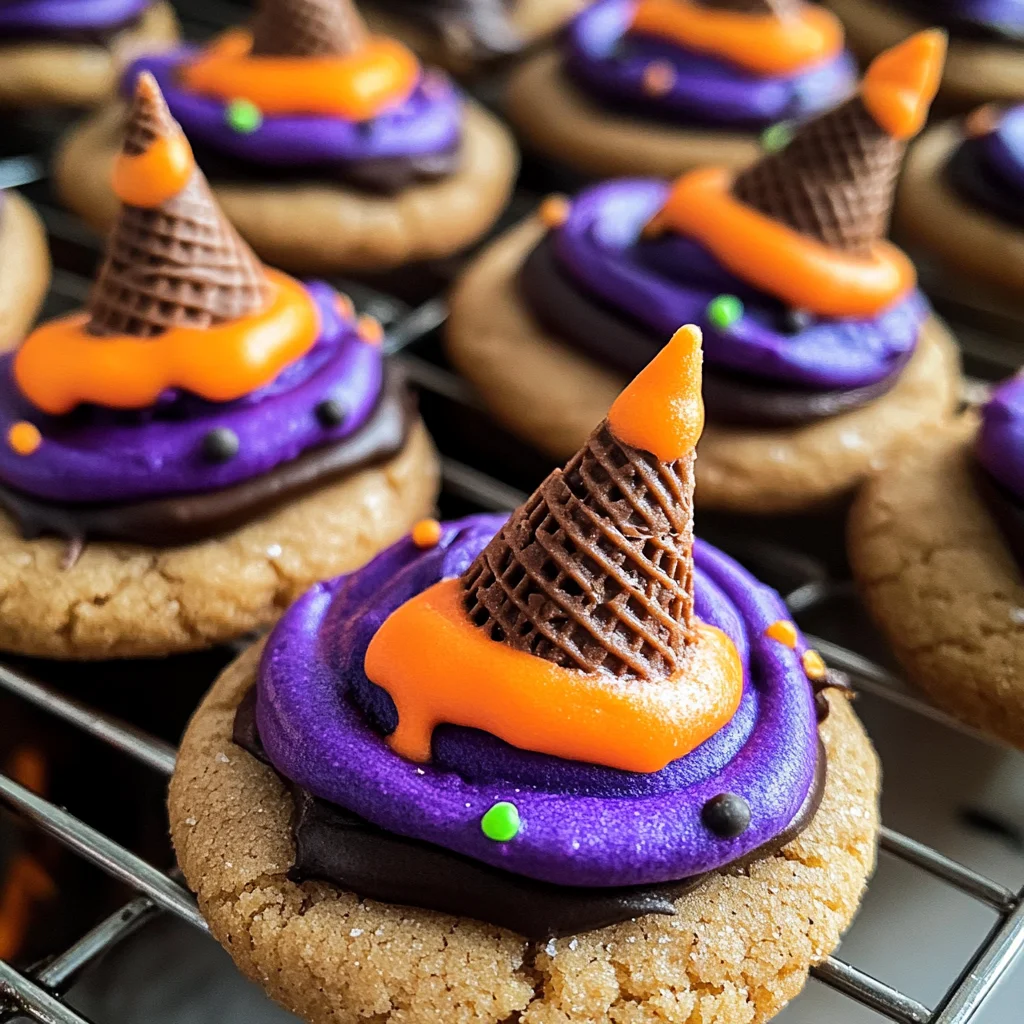
After baking, it’s time to make those cones look magical! If any cake has risen above the top of the cone, carefully trim it off with a knife. Place your cones wide side down on parchment paper and spray them with Black Color Mist. This gives them that spooky witch hat appearance. Let them dry for about 10 to 15 minutes.
Step 3: Tint the Icing & Prepare the Bags
Now comes the fun part—tinting your icing! In separate bowls, tint one cup of creamy white decorator icing orange and another cup purple by mixing violet and rose icing colors together. Prepare two decorating bags fitted with tip 2B for each color. Additionally, tint ¼ cup of creamy white decorator icing yellow by mixing golden yellow and lemon yellow icing colors. Place this in a bag fitted with tip 3 attached.
Step 4: Assemble the Witch Hats
It’s time to bring everything together! Start by piping a small amount of orange icing onto the center of a chocolate cookie and then place one sugar cone on top. For half of your cones, pipe an orange band around their wide end and smooth it out with a spatula. Repeat this process using purple icing on the remaining cones. Allow them to set for about 15-20 minutes before finishing up. Finally, grab that yellow tinted icing bag and pipe little buckles around each hat band—let them set once more before enjoying these delightful creations!
With every step taken together in this whimsical adventure, you’ll create tasty treats that will light up any Halloween celebration!
Pro Tips for Making Halloween Witch Hat Cookies
Creating these delightful Halloween Witch Hat Cookies is as fun as it is rewarding! Here are some tips to ensure your cookies turn out perfectly.
- Use Fresh Ingredients: Always check the expiration dates on your cake mix and icing. Fresh ingredients result in better flavor and texture, making your cookies even more enjoyable.
- Customize Colors: Don’t hesitate to mix and match colors when tinting your icing. This adds a personal touch and can create a festive atmosphere, making your treats stand out at any Halloween gathering.
- Practice Piping: If you’re new to piping, practice on parchment paper before working on your cookies. This will give you confidence and help you achieve clean, beautiful designs.
- Let Cookies Cool Completely: After baking, ensure the cookies cool completely before decorating. This prevents the icing from melting and retains the vibrant colors you worked hard to achieve.
- Store Properly: To keep your cookies fresh, store them in an airtight container at room temperature. This will help maintain their softness and prevent any decorations from smudging.
How to Serve Halloween Witch Hat Cookies
These whimsical cookies not only taste delightful but also make for an eye-catching centerpiece at any Halloween celebration. Here are some ideas on how to present them beautifully!
Garnishes
- Sprinkles: Add colorful Halloween-themed sprinkles around the base of the witch hats for an extra festive touch.
- Chocolate Drizzle: A light drizzle of melted chocolate over the hats can enhance their chocolaty flavor while adding a touch of elegance.
Side Dishes
- Pumpkin Spice Cupcakes: These fluffy cupcakes with a hint of pumpkin spice make for a seasonal treat that complements the witch hat cookies perfectly.
- Ghostly Marshmallow Treats: Made with puffed rice cereal and marshmallows, these sweet ghost-shaped treats are fun and easy to make alongside your cookies.
- Apple Slices with Caramel Dip: Crisp apple slices paired with creamy caramel provide a refreshing contrast to the sweetness of the cookies while keeping with a fall theme.
- Candy Corn Trail Mix: A playful mix of candy corn, nuts, and dried fruit creates a sweet-and-salty snack that guests can munch on throughout the party.
By following these serving suggestions, you’ll create a visually stunning dessert table that will delight both children and adults alike during this festive season! Enjoy making and sharing these spooky yet delicious treats!
Make Ahead and Storage
These Halloween Witch Hat Cookies are not only fun to make but also perfect for meal prep! You can prepare the components ahead of time, making it easy to assemble them right before your Halloween gathering.
Storing Leftovers
- Store any leftover cookies in an airtight container at room temperature for up to 3 days.
- If you want to keep them fresh longer, consider refrigerating them for up to a week.
Freezing
- To freeze these cookies, place them in a single layer on a baking sheet and freeze until solid.
- Once frozen, transfer them to an airtight container or freezer bag and store for up to 2 months.
Reheating
- If desired, you can gently reheat the cookies in the oven at 200°F (93°C) for about 5 minutes to restore their freshness.
- Avoid microwaving as this may make them chewy rather than maintaining their delightful crunch.
FAQs
Here are some common questions you might have about making these Halloween Witch Hat Cookies!
Can I customize the colors of my Halloween Witch Hat Cookies?
Absolutely! Feel free to use any food coloring you like. Just remember to choose shades that fit your Halloween theme—be creative!
How do I ensure my Halloween Witch Hat Cookies turn out perfectly?
To achieve the best results, make sure your sugar cones are completely dry after spraying with color mist. Also, allow enough time for the icing to set between steps.
What’s the best way to store my Halloween Witch Hat Cookies?
Store them in an airtight container at room temperature for a few days, or refrigerate them for up to a week. They also freeze well for longer storage!
Can I use homemade cookies instead of store-bought chocolate cookies?
Definitely! Homemade cookies can add a personal touch and may even enhance the flavor. Just ensure they are sturdy enough to hold the weight of the icing and cone.
Final Thoughts
I hope you find joy in creating these whimsical Halloween Witch Hat Cookies! They not only bring festive cheer but also offer a delightful opportunity to get creative with colors and decorations. Whether you’re making them with family or surprising friends at a party, I’m sure they’ll be a hit among all ages. Enjoy every step of this fun project, and don’t forget to share your spooky creations!
Halloween Witch Hat Cookies

Bring a touch of magic to your Halloween festivities with these delightful Halloween Witch Hat Cookies! Perfect for parties or family gatherings, these treat cones are as fun to make as they are to eat. Featuring chocolate cookies topped with colorful icing and whimsical sugar cone hats, they offer endless opportunities for creativity. Kids can easily join in on the fun, turning baking time into lasting memories. With their playful design and delicious taste, these cookies are sure to be the star of your spooky celebrations!
- Prep Time: 30 minutes
- Cook Time: 15 minutes
- Total Time: 45 minutes
- Yield: Approximately 12 cookies
- Category: Dessert
- Method: Baking
- Cuisine: American
Ingredients
- Chocolate cake mix
- Store-bought chocolate cookies or homemade chocolate cookies
- Sugar cones
- Creamy white decorator icing
- Black food coloring
- Orange food coloring
- Yellow food coloring
- Violet food coloring
- Rose food coloring
Instructions
- Prepare the cake mix according to package instructions. Preheat the oven and bake sugar cones filled with batter until golden brown. Let cool.
- Trim any excess cake from the top of the cones and spray them with black color mist. Allow drying.
- Tint the decorator icing in various colors and prepare piping bags.
- Assemble by piping icing onto chocolate cookies and placing cones on top. Decorate with additional icing for details.
Nutrition
- Serving Size: 1 serving
- Calories: 140
- Sugar: 15g
- Sodium: 90mg
- Fat: 5g
- Saturated Fat: 2g
- Unsaturated Fat: 3g
- Trans Fat: 0g
- Carbohydrates: 23g
- Fiber: 1g
- Protein: 1g
- Cholesterol: 0mg