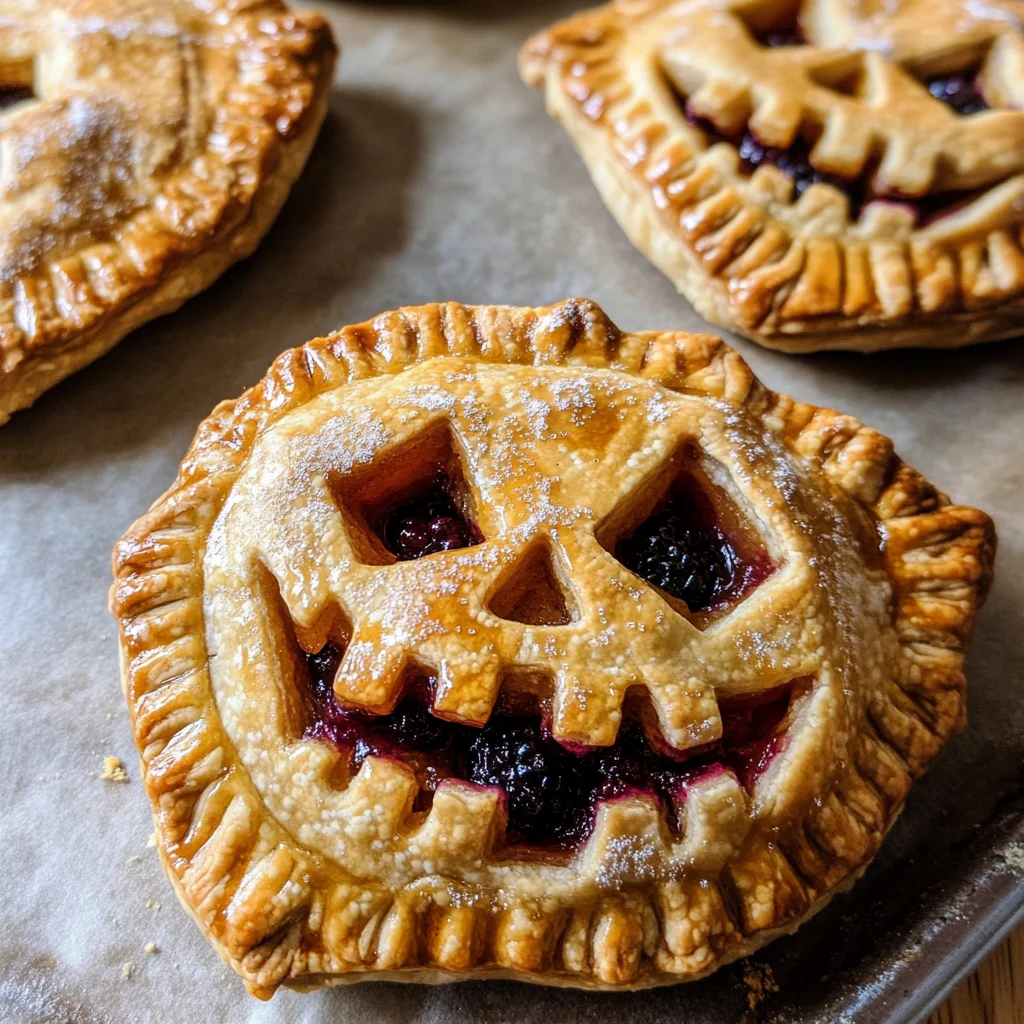
Jack-O-Lantern Hand Pies
If you’re looking for a delightful treat to impress your friends and family this Halloween, these Jack-O-Lantern Hand Pies are just the answer! Not only are they super cute, but they also combine the sweet flavors of honey crisp apples and fresh blackberries into a flaky, buttery crust that’s hard to resist. These hand pies are perfect for busy weeknights, family gatherings, or even as a fun addition to your Halloween party spread. Imagine biting into one of these adorable little pies and discovering the delicious filling inside—your guests will love them!
Why You’ll Love This Recipe
- Easy to Make: With simple steps, you can whip up these hand pies without any fuss.
- Family-Friendly Fun: Kids will enjoy helping with the pumpkin faces and filling!
- Make-Ahead Friendly: Prepare the dough and fillings in advance for a stress-free bake.
- Deliciously Versatile: Fill them with your favorite fruits or jams for different flavor combos.
- Perfect for Any Occasion: Whether it’s a spooky Halloween gathering or a cozy fall day, these hand pies fit right in.
Ingredients You’ll Need
Making Jack-O-Lantern Hand Pies is all about using simple, wholesome ingredients that come together beautifully. Here’s what you’ll need:
For the Pie Dough
- 2 1/2 cups all-purpose flour
- 1 tablespoon granulated sugar
- 1 teaspoon kosher salt
- 2 sticks (8oz) unsalted butter, diced and very cold
- 6-9 tablespoons ice water
- 1 egg (for egg wash)
- 1/4 cup raw or turbinado sugar (for sprinkling)
For the Filling
- 2 large honey crisp apples (peeled and diced small)
- 3 tablespoons salted butter
- 2 tablespoons bourbon barley tea (you can substitute with regular brewed tea)
- 1 teaspoon vanilla bean paste
- 1/2 teaspoon ground cinnamon
- 2/3 cup brown sugar
- 18 oz fresh blackberries
- 1/3 cup granulated sugar
- 1 teaspoon vanilla extract
Variations
This recipe is wonderfully flexible! Feel free to get creative and make it your own with these variations:
- Change Up the Fruit: Swap out honey crisp apples for pears or peaches for a different flavor profile.
- Add Some Spice: Mix in additional spices like nutmeg or ginger for an extra kick.
- Try Different Sweeteners: Use maple syrup or agave instead of brown sugar for a unique sweetness.
- Experiment with Fillings: Try using your favorite jams or chocolate chips instead of fruit filling!
How to Make Jack-O-Lantern Hand Pies
Step 1: Prepare the Crust
To make the crust, start by mixing together the flour, sugar, and salt in your stand mixer. This helps ensure that everything is evenly distributed. Then, add in those cold butter pieces. The key here is mixing until the texture resembles coarse sand with some pea-sized butter chunks. This will give you that flaky crust we all love! Gradually add ice water until it forms clumps around the paddle. If it’s too dry, don’t hesitate to add more water just a teaspoon at a time.
Step 2: Chill Your Dough
Once mixed, tip out the dough onto a floured surface and knead it into a rough ball. Dividing it into two portions makes it easier to work with later on. Wrap each portion in plastic wrap and flatten into discs before chilling them in the fridge for at least an hour. Chilling helps relax the dough and makes it easier to roll out.
Step 3: Make the Apple Filling
In a stainless steel sauté pan, melt some butter until it’s just golden brown—this adds a lovely richness to our filling! After adding diced apples, let them cook briefly before adding bourbon barley tea (or brewed tea). This step infuses flavor! Then mix in vanilla, cinnamon, and brown sugar; cooking this mixture until it thickens allows those delicious flavors to meld together.
Step 4: Roast Blackberries
For our blackberry filling, preheat your oven while lining a baking sheet with parchment paper. Roasting blackberries enhances their natural sweetness—trust me, it’s worth it! After about 30 minutes of roasting, transfer them to a pot with sugar and vanilla extract; simmering thickens this luscious filling even more.
Step 5: Roll Out Dough & Cut Shapes
Now that your dough has chilled nicely, roll it out on a floured surface until it’s about an eighth of an inch thick. Using your pumpkin cookie cutter (or any shape you fancy), cut out pieces for both tops and bottoms of your hand pies. Place those beautiful pumpkin shapes on another lined baking sheet and chill them again briefly while you prepare for assembly.
Step 6: Assemble Your Hand Pies
Preheat your oven one last time before assembling! Place uncut pumpkin shapes on parchment-lined sheets and fill each center with about 1½ tablespoons of apple or blackberry filling. Brush egg wash around edges before placing another pumpkin cutout on top and sealing everything shut with fork prongs—that’s where all that goodness stays tucked away! A final brush of egg wash gives them that golden finish when baked.
Pop them in the oven and let them bake until they’re dark golden brown—your kitchen will smell heavenly! Once they’re cooled slightly on a rack, serve these adorable Jack-O-Lantern Hand Pies at your next gathering. Enjoy every delicious bite!
Pro Tips for Making Jack-O-Lantern Hand Pies
Making these adorable hand pies is a delightful experience, and with a few helpful tips, you can ensure they turn out perfectly every time!
- Use cold ingredients: Keeping your butter and water ice-cold helps create that flaky crust we all love. This prevents the fat from melting before baking, resulting in beautifully layered pastry.
- Don’t skip the refrigerator step: Chilling the dough before rolling it out allows it to relax, making it easier to handle and less likely to shrink during baking. A little patience goes a long way towards perfect hand pies!
- Experiment with fillings: While apple and blackberry are fantastic combinations, feel free to get creative! Consider using other fruits like peaches or pears, or even savory fillings like pumpkin or spinach and cheese for a unique twist.
- Seal them well: Ensure that you press the edges of the pie crust firmly together after filling to avoid any leaks during baking. A fork works wonders for creating a decorative seal while also ensuring no filling escapes!
- Watch the baking time: Every oven is different; keep an eye on your hand pies during the last few minutes of baking. You want them golden brown but not burnt—trust your instincts!
How to Serve Jack-O-Lantern Hand Pies
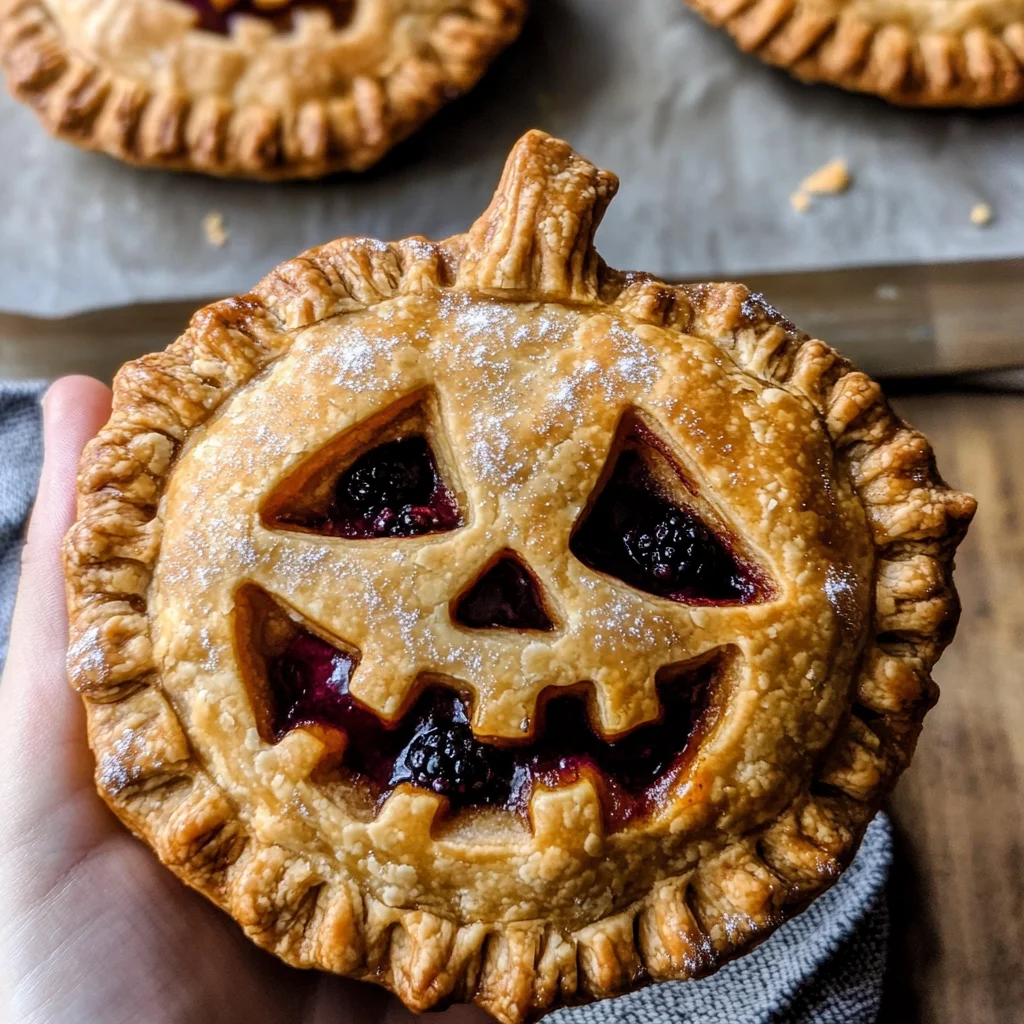
These Jack-O-Lantern Hand Pies are as delightful to present as they are to eat! Here are some fun ideas for serving them at your Halloween gatherings.
Garnishes
- Fresh mint leaves: A sprig of mint adds a pop of color and a refreshing contrast to the sweet filling.
- Powdered sugar dusting: Lightly dusting with powdered sugar gives a festive touch, making them look even more enticing.
- Cinnamon sprinkle: Adding a hint of cinnamon on top enhances the flavor profile and ties in beautifully with the apple filling.
Side Dishes
- Pumpkin soup: A warm bowl of creamy pumpkin soup complements the sweetness of the hand pies and makes for a cozy fall meal.
- Mixed green salad: A light salad with seasonal greens and a vinaigrette dressing balances out the richness of the pies, providing a fresh note.
- Roasted vegetables: Caramelized Brussels sprouts or root vegetables bring an earthy flavor that pairs well with the sweetness of the pies.
- Apple cider: Serve warm or chilled apple cider on the side for a festive drink that echoes the apple filling in your hand pies.
Enjoy these Jack-O-Lantern Hand Pies at your next Halloween celebration—they’re sure to be a hit!
Make Ahead and Storage
These Jack-O-Lantern Hand Pies are perfect for meal prep! You can easily make the dough and fillings ahead of time, allowing you to assemble and bake them fresh when you’re ready to serve.
Storing Leftovers
- Allow the hand pies to cool completely before storing.
- Place them in an airtight container at room temperature for up to 2 days.
- For longer storage, keep them in the refrigerator for up to a week.
Freezing
- Freeze unbaked hand pies before brushing with egg wash.
- Place them on a baking sheet lined with parchment paper until frozen solid, then transfer to a freezer-safe bag or container.
- They can be stored in the freezer for up to 3 months.
Reheating
- Preheat your oven to 350°F (175°C).
- Place the hand pies on a baking sheet and cover lightly with aluminum foil.
- Heat for about 15-20 minutes until warmed through and crisp.
FAQs
Here are some common questions about making Jack-O-Lantern Hand Pies!
Can I use other fruits for my Jack-O-Lantern Hand Pies?
Absolutely! Feel free to experiment with different fruits such as pears, peaches, or even mixed berries. Just ensure they are ripe and flavorful!
How do I ensure my Jack-O-Lantern Hand Pies have a flaky crust?
The key is using very cold butter and ice water when making the dough. Don’t overmix; you want those little pieces of butter intact for that flaky texture!
Can I prepare the filling ahead of time for my Jack-O-Lantern Hand Pies?
Yes, you can make both apple and blackberry fillings up to two days in advance. Store them in airtight containers in the fridge until you’re ready to assemble your pies.
Are Jack-O-Lantern Hand Pies suitable for parties?
Definitely! These delightful hand pies not only taste amazing but also add a festive touch to any Halloween gathering.
Final Thoughts
I hope this recipe brings warmth and joy to your Halloween celebrations! These Jack-O-Lantern Hand Pies are not just delicious but also fun to make, allowing you to get creative with their spooky faces. Enjoy every moment spent crafting these tasty treats, and don’t forget to share them with friends and family. Happy baking!
Jack-O-Lantern Hand Pies

Jack-O-Lantern Hand Pies are the perfect festive treat to celebrate Halloween! These delightful little pastries feature a flaky, buttery crust filled with sweet honey crisp apples and fresh blackberries. Their charming pumpkin shape adds a playful touch, making them an ideal addition to any Halloween gathering or cozy fall day. With easy preparation steps, these hand pies are family-friendly and versatile enough to accommodate various fruit fillings. Imagine the joy of biting into one of these adorable treats while surrounded by friends and family—it’s a guaranteed hit at your next party!
- Prep Time: 30 minutes
- Cook Time: 30 minutes
- Total Time: 1 hour
- Yield: Makes approximately 8 servings 1x
- Category: Dessert
- Method: Baking
- Cuisine: American
Ingredients
- 2 1/2 cups all-purpose flour
- 1 tablespoon granulated sugar
- 1 teaspoon kosher salt
- 8 oz unsalted butter (cold)
- 6–9 tablespoons ice water
- 2 large honey crisp apples (diced)
- 3 tablespoons salted butter (for filling)
- 18 oz fresh blackberries
- Ground cinnamon and brown sugar for flavoring
Instructions
- Prepare the crust by mixing flour, sugar, and salt in a stand mixer. Add cold butter until the mixture resembles coarse sand. Gradually incorporate ice water until clumpy.
- Chill the dough for at least an hour after forming it into discs.
- For the filling, sauté diced apples in browned butter, adding brewed tea, vanilla, cinnamon, and brown sugar until thickened.
- Roast blackberries with sugar and vanilla extract until soft, then simmer to thicken.
- Roll out chilled dough and cut into pumpkin shapes. Assemble by placing filling between two shapes and sealing edges with a fork.
- Bake until golden brown; enjoy warm!
Nutrition
- Serving Size: 1 hand pie (100g)
- Calories: 280
- Sugar: 15g
- Sodium: 150mg
- Fat: 15g
- Saturated Fat: 9g
- Unsaturated Fat: 5g
- Trans Fat: 0g
- Carbohydrates: 35g
- Fiber: 2g
- Protein: 3g
- Cholesterol: 30mg